NEW IN CONTINUUM 2021, The BCC Math Composite filter combines two clips using one of the Blend modes. You can choose from Add, Subtract, Multiply, Screen, Difference, Darken and Lighten.

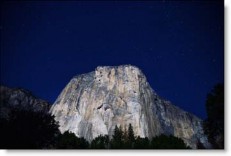
Background Image 
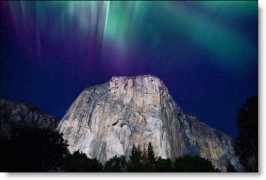
Foreground Image

Filter Parameters
Background: Selects what image to use as the background.
After Effects / Premiere Pro
- Choose the layer/track to use as the background.
Avid
- The track below the current track is automatically used as the background.
Final Cut Pro
- Click the drop zone to the right of the Background parameter, choose a clip, and press Apply Clip below the Viewer.
Motion
- Drag the image to be used as the background and place it onto the drop zone to the right of the Background parameter.
OFX
- Node Based Hosts: Hook up the background clip in the Node Graph.
- Layer Based Hosts: The layer/track below the current layer/track is automatically used as the background.
Note:Assigning the background input requires an OFX host that supports auxiliary inputs. Consult the host documentation for instructions on how to assign an auxiliary input as this will vary by host.
Blend: Selects the Blend mode that is used to combine the foreground and background.
- Add: The pixels of one image are added to another image.
- Subtract: The pixels of one image are subtracted from another image.
- Multiply: Produces a result where there is a union of pixels from two images.
- Screen: Looks at each images color information and multiplies the inverse of the two images. This looks kind of like the Add blend mode, but highlights are retained.
- Difference: Produces a result where a value exists in each image, but not in both.
- Darken: Compares two images and takes the pixels with the lower value.
- Lighten: Compares two images and takes the pixels with the higher value.
Level: Sets the level of the foreground element.
Black Clip: Blacks are made blacker by increasing the value of the slider. As the slider value increases, more values are clipped to black.
Note: Often times the black portion of the image is not entirely black. This becomes an issue if something like fire is shot against a black background. If the black is not entirely black, then these impure black areas will be added to the background image as part of the Math Composite causing the final result to have “milky” blacks. The Black Clip parameter has been added to easily adjust the foreground image’s black level.
PixelChooser: The BCC PixelChooser provides simple, built-in masking of the effect result. The PixelChooser is generally used to select a portion of the image and restrict an effect to just the selected area while maintaining the original image content in unselected regions. The selection can be based on geometric shapes or on the image’s luma/color properties.
For more information on the PixelChooser, Click Here.
Working with The Filter
- Apply BCC+ Math Composite from the Key and Blend unit:
- After Effects / Premiere Pro
- To use BCC+ Math Composite, the layers/tracks should be stacked in the following order from bottom to top: background and then foreground.
- Apply BCC+ Math Composite to the top foreground layer/track.
- Using the Background pop-up menu, choose the layer/track to be used as the background.
- Avid
- To use BCC+ Math Composite, the video tracks should be stacked in the following order from bottom to top: background and then foreground.
- Apply BCC+ Math Composite to the top foreground track.
- Final Cut Pro
- Apply BCC+ Math Composite to a clip.
- Click the drop zone to the right of the Background parameter, choose a clip, and press Apply Clip below the Viewer.
- Motion
- Apply BCC+ Math Composite to a clip.
- Drag the clip to be used as the background and place it onto the drop zone to the right of the Background parameter.
- OFX
- For node based hosts, apply BCC+ Math Composite to a foreground clip and then hook up a background clip.
- For layer based hosts, the layers/tracks should be stacked in the following order from bottom to top: background and then a foreground clip. Then, apply BCC+ Math Composite to the top foreground layer/track.
- Note:In Vegas, BCC+ Math Composite is accessed through the Composite Mode icon in the track controls and then navigating to the Custom Composite category.
- Choose the appropriate mode from the Blend pop-up menu.If the blacks in your composite look milky, it is usually because the foreground blacks are not entirely black. Depending on the Blend mode that you choose, the impure black areas may be added to the background image causing the final result to have milky blacks. You can improve milky blacks using Black Clip.
- Use Black Clip if the composite’s blacks look milky.
- Set the Level control to your liking.